Google Drive Quick Start Guide
A guide to the basics of using Google Drive.
- Return to: Google Drive and Suite Tutorials for more topics
This is for the Google Drive web interface. To set up Google Drive on your desktop, please see our Google Drive File Stream Setup Guide.
- ‘My Drive‘ is the main directory, from which you can access all your own drives.
- ‘Home‘ is your personal landing page with recently opened files from potentially many different drives, depending on what you’ve been working with. You can see the ‘Owner’ and ‘Location’ for each file/folder on the right side.
- ‘Shared Drives‘ are where all the drives that are shared with others are organized. You can see who else is able to view each file/folder by right-clicking the number under the ‘Members’ column on the far right, and selecting ‘View Members’ (may come up as ‘Manage Members’).
- ‘Shared with Me‘ has all the content you have been invited to view/comment/modify.
Note: Location Matters!
Make sure you are in the correct location. Wherever you are in the Google Drive is where your upload will live.
If you see a > followed by text, that means you are in a folder within ‘My Drive.’
Step 1
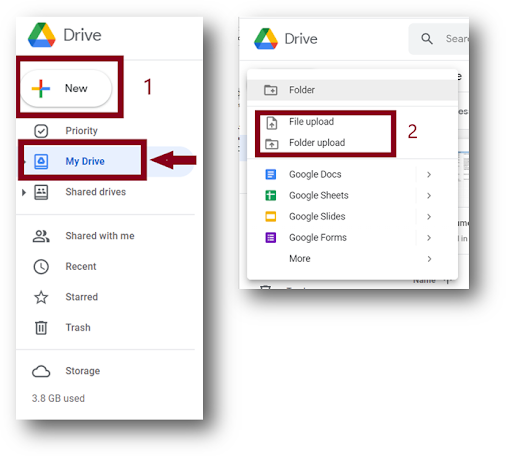
Click the ‘+New’ button (upper left) to open an upload dialogue box.
Step 2
Choose ‘File Upload’ or ‘Folder Upload’
Browse for the content you would like to upload and click ‘Open.’
Step 1
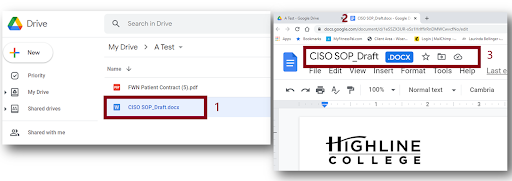
To edit a file, double-click the file you wish to edit (do not download to edit).
Step 2
File will open in new browser tab.
Make your changes to the file.
Drive will automatically save file as you work.
In the example below, it is a Word document, so the .docx is highlighted in blue. Google Drive can open and edit Excel, Word, and PowerPoint documents and still keep the Microsoft formatting.
- See also: Work with Office Files using Office Editing
- See also: Find What’s Changed in a file
To share a file, you will need to create a link to your file, or grant specific people access (they will be sent an email notifying them).
Step 1
Right click on the file you want to share, and select ‘Share,’ which will open a small menu on the right.
- You will want to select ‘Share’ so you can customize your access/role settings, which determine who can view or edit your file.
- Choosing ‘Copy link’ will create a link based on the current settings, which by default restrict access to users that have already been granted permission. Anyone else trying to use the link will get blocked and told to request permission.
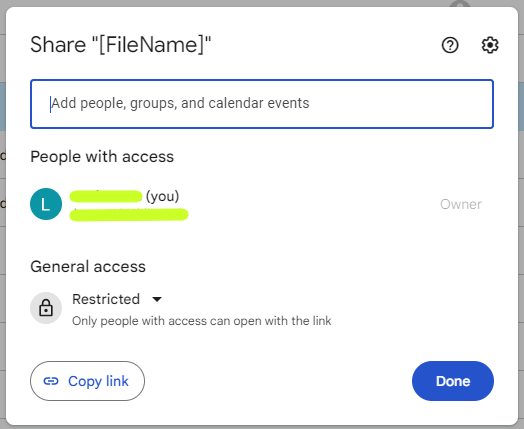
By selecting ‘Share,’ you will see a dialogue box (it will say ‘Share [your file name]‘ at the top).
People with access’ shows all users that currently have access, and what their Role is. Your name and email address will be there.
Step 2
- You can choose to ‘Add people, groups, and calendar events’ by writing in their email address into the text box
or
- You can adjust the ‘General access’ settings and make a link that you can send to whomever you want to.
To make a Link:
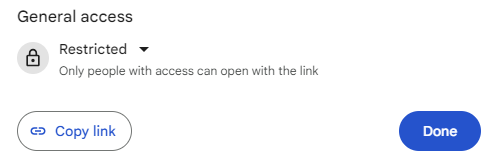
Look under ‘General Access,’ and you will see that by default the access is set to ‘Restricted.’
- ‘Restricted’ means only users with access can open with the link (these will be the users listed in the ‘People with access’ section.
Step 3
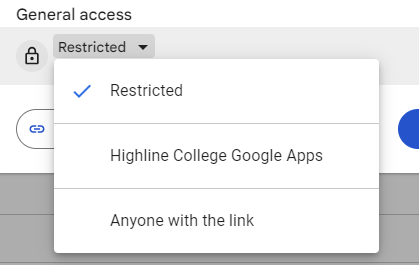
Click on ‘Restricted’ and a drop down menu will offer these other access permission options:
- Highline College Google Apps: Only other users with Highline.edu credentials may view it. You can change the Role for those users next.
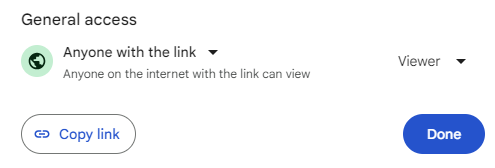
- Anyone with the link: This will allow anyone with the link to have access. You can change the Role for those users next. No log in is required for access.
Step 4
You can choose to click the drop-down menu to change a user’s Role from ‘Viewer’ to something else.
- Viewer: Can only view the file (read-only), can not modify.
- Commenter: Can view the file but post comments on it, which do not modify the file itself.
- Editor: Can view and modify the file.
Step 5
Select ‘Copy link’ when you are ready. Once copied, you can paste the link wherever you like, such as an email or document.
- See also: Sharing Files from Google Drive
- See also: Stop, limit, or change sharing
Step 1
To upload a new version of an existing file, save the file using the same file name as the file currently stored in Drive.
Step 2
Drag and drop the new file into Drive in the same location as the old file.
Step 3
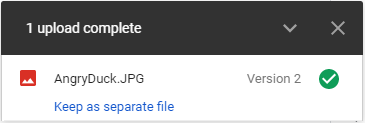
By default, the old file will be written over and replaced by the new file. However, if you want to keep both versions with the same name, click “Keep as separate file” (blue text) on the popup that appears at the bottom right of your screen when the upload is complete. It will keep the new file and mark it as a separate version (as in the example, where is says “Version 2.”)
The ‘Sharing a File’ section above covers some of this, but here is a more in-depth view.
Understand Permissions
Drive permissions for Personal Drives (My Drive) follow a waterfall design. This means:
- Individuals not only have access to folders they are invited into but any subfolders beneath it.
- You may invite people to individual files if you do not wish to share the entire folder and its subfolders.
- Anyone trying to open a file or folder they do not have access to will come to a page notifying them that they must request permission, and provides a text box they can use to send the file/folder owner a message.
Grant Permissions
You can grant permissions to content in one of two ways:
- Invite People
- Enter the email addresses or names of the individuals or groups you would like to grant permission to, then choose to invite them as editors, commenters or viewers.
- Shared Links
- Choose ‘Copy link’ to generate a hyperlink to the file or folder. It will be based on the current settings, which by default restrict access to users that have already been granted permission. Anyone else trying to use the link will get blocked and told to request permission.
Access Levels
- Restricted: Only users with access can open with the link (these will be the users listed in the ‘People with access’ section.
- Highline College Google Apps: Only other users with Highline.edu credentials may view it. You can change the Role for those users next.
- Anyone with the link: This will allow anyone with the link to have access. You can change the Role for those users next. No log in is required for access.
Roles
- Viewer: Can only view the file (read-only), can not modify.
- Commenter: Can view the file but post comments on it, which do not modify the file itself.
- Editor: Can view and modify the file.
The best ways to manage your Drives, folders, and files while maintaining security and continuity.
- Set expiration dates to limit sharing for a finite period on individual files and folders.
- Limit collaboration to individuals within CMU by inviting people to share content.
- Always transfer ownership of folders and files when off-boarding students and staff.
- Use Shared Drives for managing content within a team.
- Visit Google Drive Cheat Sheet for more
Questions?
- Please contact the Help Desk.