Google Drive File Upload Guide
- Return to: Google Drive Help
Upload Methods
You can use one or both of these methods, based on your preference. Details on how to use each option are below.
Step 1
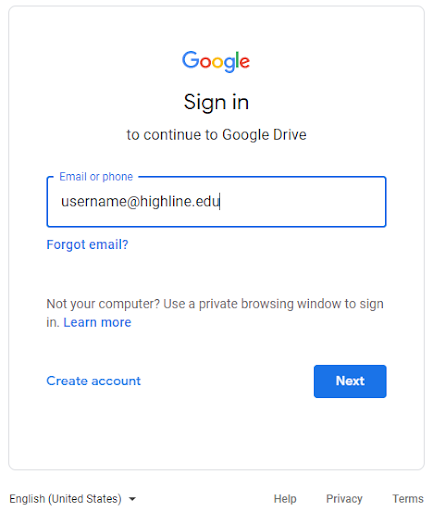
Open up any web browser and navigate to Google Drive.
Enter in your entire Highline.edu email and click ‘Next.’

Step 2
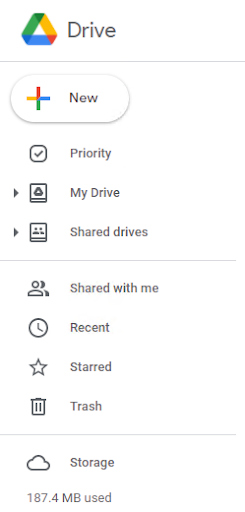
You will then be welcomed with the main Google Drive screen!
From here, you can navigate through your personal drive, any shared drives/files and create folders/files or upload files, using the methods below.

Upload Methods:
- Click & Drag: If you already have a wonderful folder organization system set up on your Highline network drive or local computer, you can just select the main folder within Explorer, click and hold with your mouse, and drag it to the Google Drive window.
- The +New button: Just click the +New button on your Google Drive menu and select the option (‘File Upload’ or ‘Folder Upload’) that you plan to upload. From there, just navigate to the file or folder you want to upload, highlight it, and click ‘Upload.’

- Right-Click: Anywhere in the blank space of Google Drive, right-click with your mouse and select the type of upload that you want to do.
Step 1
Before you use the drive letter method (formally known as ‘Back Up & Sync’) for the first time, you will need to download and install it on your computer. If you use multiple devices and want to save/access files everywhere, you’ll need to repeat the installation process on each device.
- Download and install via the instructions in the Google Drive for Desktop/Mobile Setup Guide.
Step 2
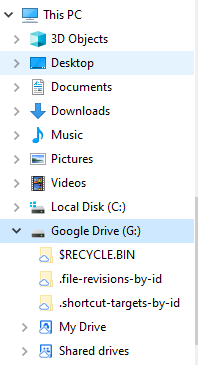
Windows: Open your Windows File Explorer on your computer.
![]()
or;
macOS: Open your Finder on your computer.
![]()
Step 3
Windows: In the menu on the left, you will see the Google Drive (G:) below the Local Disc (C:)

macOS: In the menu on the left, you will see the Google Drive under ‘Devices.’

Step 4
It behaves the same as the rest of Windows File Explorer or macOS Finder. You can use the same methods to upload, move, open, delete, etc.
See also: Microsoft Windows File Explorer Help Guide
See also: macOS Finder Help Guide
Keep in mind: If you use Google File Stream, it may take a minute or two for the changes to be reflected on the web interface.
Important Locations
- ‘My Drive‘ is the main directory, from which you can access all your own drives.
- ‘Home‘ is your personal landing page with recently opened files from potentially many different drives, depending on what you’ve been working with. You can see the ‘Owner’ and ‘Location’ for each file/folder on the right side.
- ‘Shared Drives‘ are where all the drives that are shared with others are organized. You can see who else is able to view each file/folder by right-clicking the number under the ‘Members’ column on the far right, and selecting ‘View Members’ (may come up as ‘Manage Members’).
- ‘Shared with Me‘ has all the content you have been invited to view/comment/modify.
Important Tips
- You can upload, view, share, and edit files with Google Drive.
- Wherever you are in the Google Drive is where your upload will live. If you see a > followed by text, that means you are in a folder within ‘My Drive.’
- When you upload a file to Google Drive, it will take up space in your Drive, even if you upload to a folder owned by someone else.
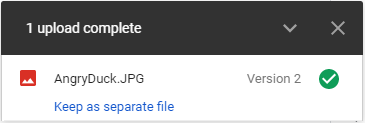
- If you upload a file with the same name as a file that is already in that Google Drive location, Google Drive will overwrite the older, existing file. Want two separate files? Click “Keep as separate file” (blue text) on the popup that appears at the bottom right of your screen when the upload is complete.

Questions?
- Please contact the Help Desk.

