Highline Wi-Fi for Windows OS
These are the instructions for connecting to the Highline Wireless Network through Windows OS.
- Return to: Highline Wi-Fi Guide
Instructions
Step 1
- Please note: Your screen may look different based on your version of Windows and settings.
There are a couple ways that may be available to you to reach your network settings.
Option 1 – Find the upturned arrow on your navigation bar (by default it is usually on the bottom right of your screen) and click it. This will open up a small menu full of icons. Select the globe to view available Wi-Fi networks.
Option 2 – If the signal icon (the dot with waves coming from it) is there, you can click it to open a list of available Wi-Fi networks.

Step 2
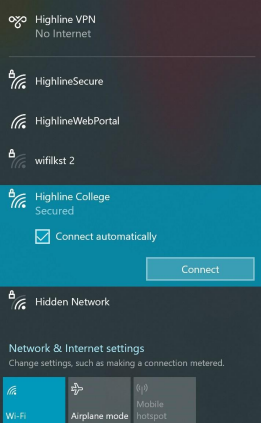
Select ‘Highline College’ from the list of available networks.
Check the ‘Connect automatically’ box and then click the ‘Connect’ button.

Step 3
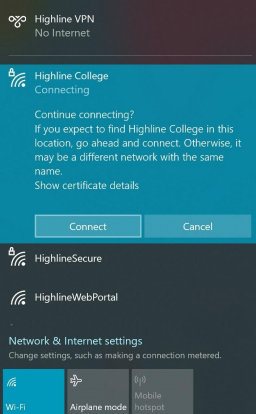
At the prompt, click ‘Connect.’

Step 4
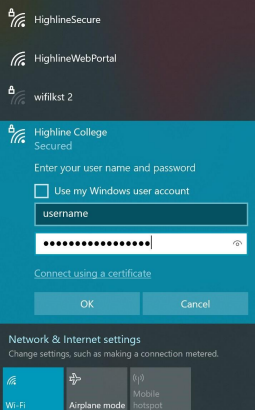
Enter your Highline username and password.

Step 5
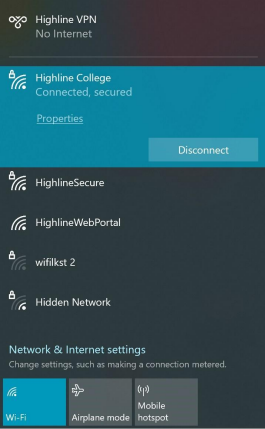
You are now connected to the Highline College Wireless network

Questions?
- Please contact the Help Desk.

