texthelp Read&Write Installation Guide
What is texthelp Read&Write?
Read&Write is a literacy support tool that offers help with everyday tasks like reading text out loud, understanding unfamiliar words, researching assignments, and proofing written work.
Read&Write is available to all Highline College students, staff, and faculty as an application installed on Highline College devices. It can also be installed and activated on a personal device.
- See also: Read&Write Activation Guide (to be completed after the app has been installed).
Instructions: Install Read&Write
Step 1
Download the ReadWrite Windows Installer here. It may say that a preview is not available, but that is not a problem. Once downloaded, locate the downloaded file setup.zip in your Downloads folder on your computer.
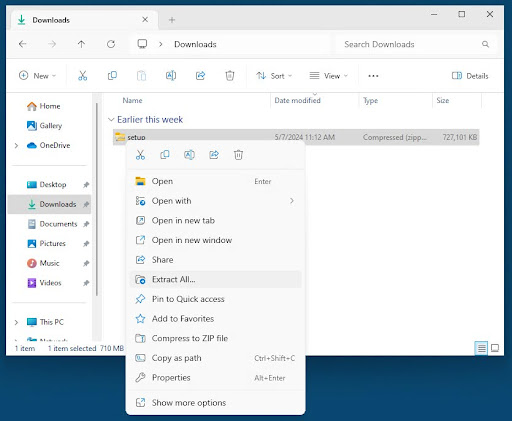
Right-click on setup.zip, then select ‘Extract All’ from the menu options.
Step 3
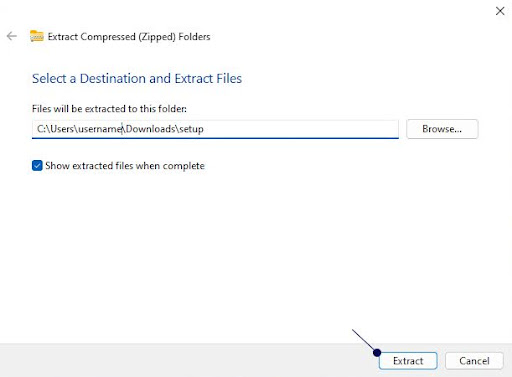
Select the ‘Extract’ button to continue. It will extract the files into your Downloads folder.
Step 4
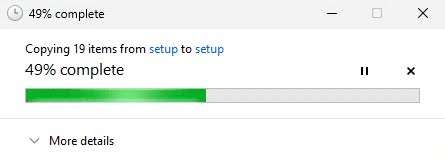
Wait for setup files to be extracted from the setup.zip file into your folder.
Step 5
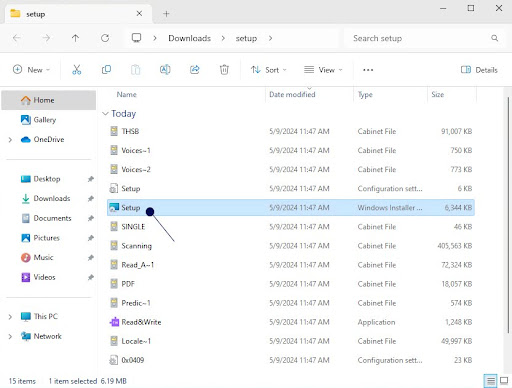
After extraction is complete, the folder with the setup files will come up. Double left-click to select setup.msi to open the installer.
Step 6
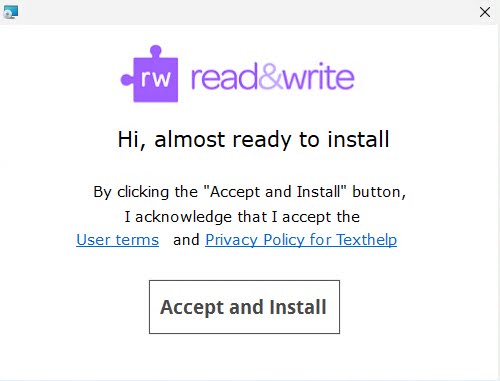
From the Read&Write window that appears, select ‘Accept and Install’ to begin the installation process.
Step 7
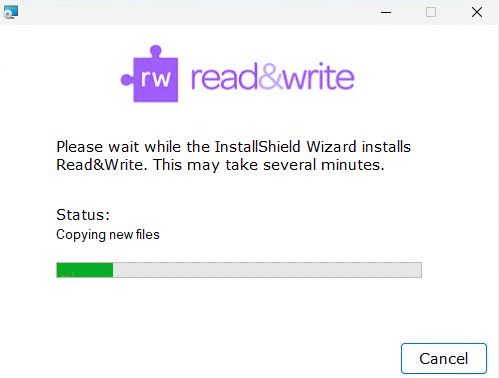
Wait for the Installer (InstallShield Wizard) to copy and install Read&Write and click ‘Close’ when it is complete.
Step 8
A shortcut for Read&Write will appear on your Desktop. Double left-click the desktop shortcut to launch the Read&Write app.
![]()
- Next step: To activate your Read&Write account, see the Read&Write Activation Guide
Step 1
Download the ReadWrite Installer for MacOS. It may say that there is no preview available, but that is not a problem.
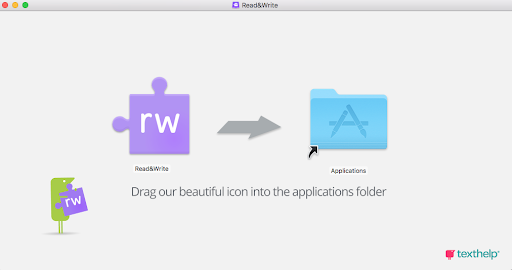
Run the read&write.dmg and you will get the following screen. Left-click and hold to drag the Read&Write icon (rw) to the Applications folder.
Step 2
Read&Write will start copying to your Applications folder.

Step 3
The Read&Write icon will appear in your Applications folder, double left-click to run.
![]()
Step 4
The next screen is a routine security check by Apple, and should say similar to the example below. Select ‘Open.’
![Screenshot of popup for MacOS installation of Read&Write. It reads: "“Read&Write” is an app downloaded from the internet. Are you sure you want to open it? Chrome downloaded this file [day and time]. Apple checked it for malicious software and none was detected." If your screen says similar, click 'Open' to continue.](https://its.highline.edu/wp-content/uploads/sites/73/2024/05/MacOS-readwrite-security-check.png)
Step 5
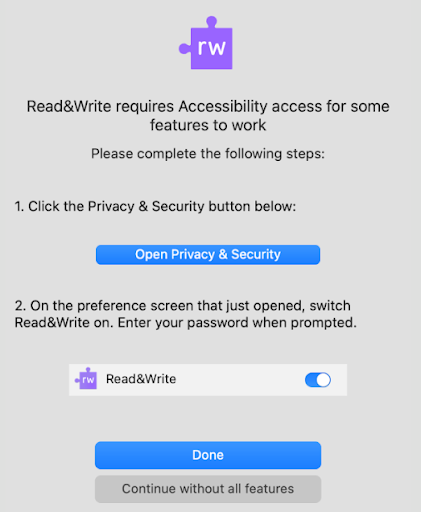
The Security & Privacy Screen will appear and explain the next steps to grant Read&Write Accessibility access so all its features can work.
Step 6
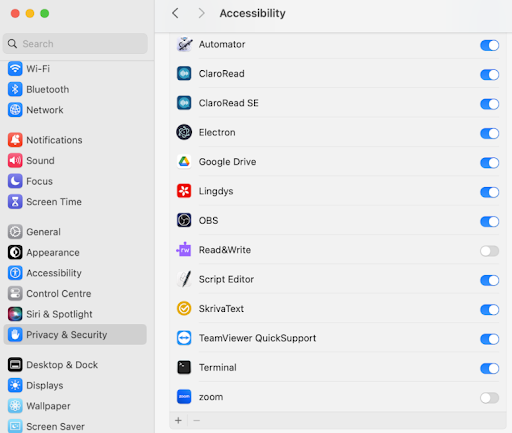
First, click on the blue ‘Open Privacy & Security’ button. The Accessibility window will appear, showing a list of apps including ‘Read&Write.’ Note that the toggle switch to the right of the name is currently grey and the white circle is on the left side, which means it is turned off.
Step 7
Click on the Read&Write toggle button to turn it on (it will turn blue), as shown here.
![]()
Step 8
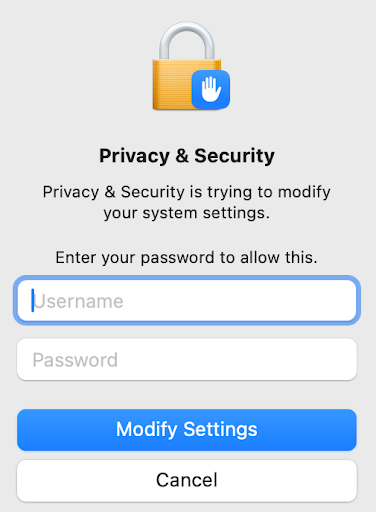
Since you are modifying system settings by granting Read&Write accessibility access, it will prompt you to sign in to confirm your identity. Please enter your myHighline username and password and click ‘Modify Settings.’
Step 9
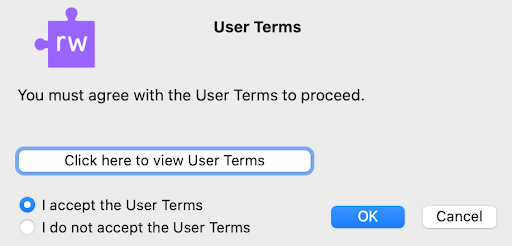
Click the ‘OK’ button to accept the User Terms.
- Next step: To activate your Read&Write account, see the Read&Write Activation Guide
Additional Resources
Questions?
- Please contact the Help Desk.

