Watermark Tutorial
Setting your Meeting Availability
Once you have set up your Watermark meeting scheduler, you must select the location(s) and service(s) you will be available for, and at what days, times, and modalities.
- Return to the Faculty and Staff Guide to Watermark
Instructions
Step 1
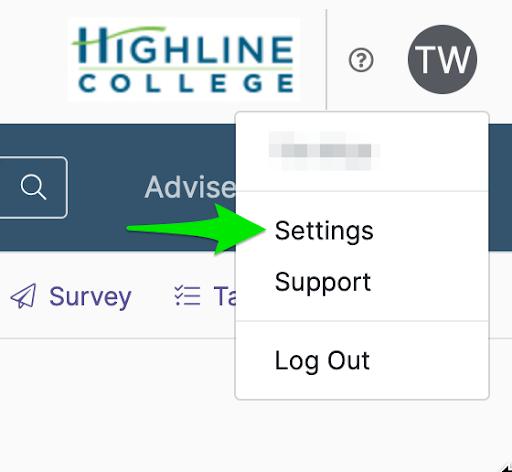
From the Watermark Home Screen, click your profile icon (user initials) in the top right corner, then choose ‘Settings’ from the drop-down menu.

Step 2
Once in settings, scroll to the ‘Meeting Availability (New Scheduler)’ and click the ‘+Add’ button to add a location.

Step 3
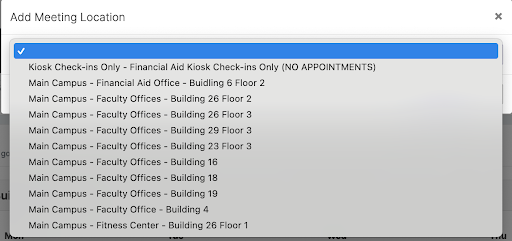
Select the location you would like to schedule appointments at from the drop-down. Locations are listed by office, building, and floor.
- At this time locations are configured for Faculty Offices, Financial Aid, and Tech Tutoring. Additional locations will be added as we bring additional services into Watermark for scheduling.

Step 4
Once a location has been selected, you will be able to choose the days, times, and modalities you will be available.
- For each day, choose the start and end of the times you’re making available for students appointments. Students will only see appointment options that are both between those times and are not blocked in your Outlook calendar.
- If there is more than one service available at that location you can also choose which service(s) you will be available for.
- For each day, also choose whether you will be available for In-Person or Online appointments, or both.
Once you are done selecting your times and modalities, click ‘Save’ to save your availability.

Step 5
If you have two availability windows in a day, you can add an additional row. In the example below, the individual is taking online appointments only for evening students from 5-6pm 2 evenings a week.

Questions?
- Please contact the Help Desk.

