Watermark Tutorial
Set Up the Meeting Scheduler
Watermark’s meeting scheduler allows students to set up meetings with different offices or with specific members of their success team. Each employee accepting appointments via Watermark must connect their Watermark account to their Microsoft365/Outlook account. When connected, the meeting scheduler automatically syncs the calendars. Students can’t schedule meetings for times you already have booked or blocked out in Outlook.
- Return to the Faculty and Staff Guide to Watermark
Instructions
Step 1
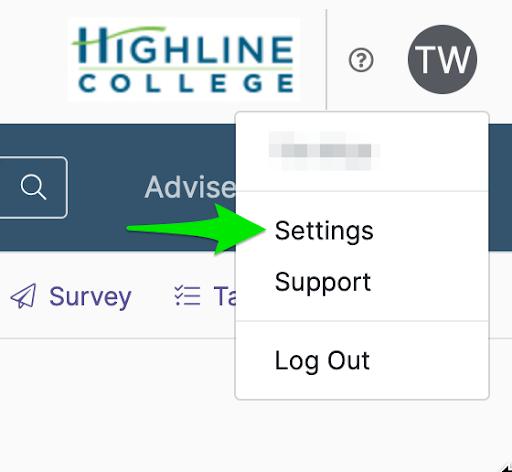
Log in to Watermark. From the Home Screen, click your profile icon (user initials) in the top right corner, then choose ‘Settings’ from the drop-down menu.

Step 2
Once in ‘Settings,’ scroll down to the ‘Calendar Access (New Scheduler)’ section. If the ‘Microsoft Connection Status’ says ‘Connected’ you are all set. If it says ‘Not Connected,’ click the ‘Log into Microsoft 365’ button.

Step 3
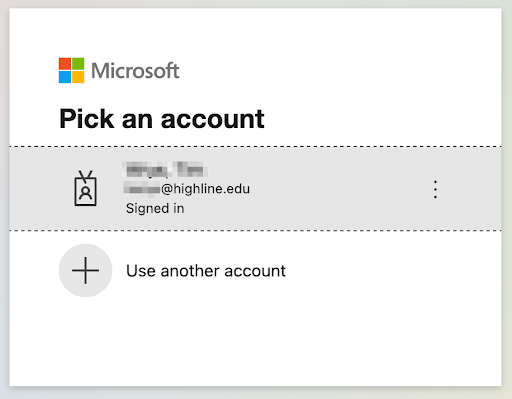
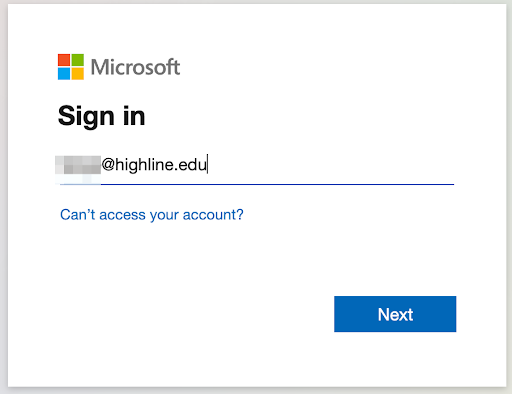
You will be redirected to a Microsoft365 login screen. If you are already logged in to Microsoft365 in the current browser, you will be asked to pick an account. If you are not, you will be asked to enter your email account. Make sure to enter or choose your @highline.edu email address.
You may have to enter your username and password through Highline’s Okta/myApps portal.


Step 4
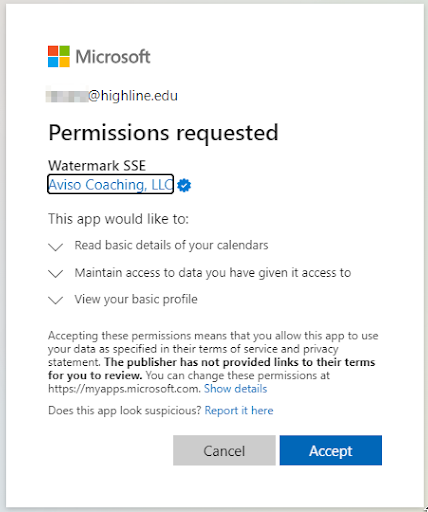
You will then be taken to a Permissions Requested screen. Click the Accept button to connect your Watermark account to your Microsoft365 account.

Step 5
You will be returned to your Watermark settings screen, and should now see your Microsoft Connection Status as “Connected since [today’s date]”.

Step 6
Continue to the next section to configure your Meeting Scheduler Details.
- Check the ‘Accept scheduled meetings from students’ box.
- Check the ‘Accept walk-in meetings from students’ box ONLY if your department is utilizing a ‘Next Kiosk’ check-in.
- Set the lead time you want the system to require. Students will have to schedule that far in advance. If you are willing to accept same-day appointments, you can set it for something like 30 minutes or 2 hours. If you want appointments at least a day in advance, you set it for something like 12 or 24 hours.
- Set the ‘Online Meeting Link’ to the default link for your online meetings. This can be a Zoom or a Teams link. This link will be provided to students in their meeting confirmation.
- Under ‘My Scheduling Link,’ you can copy the link and list it in your directory listing or elsewhere to allow students to jump directly to scheduling a meeting with you.
Click ‘Save’ to save your settings changes.
![Watermark faculty Meeting Scheduler. Checkbox for "Accept walk-in meetings from students." Check box for "Accept scheduler meetings from students." Lead time section has "I would like at least [enter number] hours (drop down box to chose other measurements of time) of advance notice when a meeting is scheduled. Time zone is listed. "My Scheduling Link" has the pre-made link to the online scheduler. Then the "Online Meeting Link" lets you enter the link to the online meeting room.](https://its.highline.edu/wp-content/uploads/sites/73/2024/09/Watermark-faculty-meeting-scheduler.png)
Questions?
- Please contact the Help Desk.

