Highline VPN (Virtual Private Network)
Windows Setup
Guide to setting up the GlobalProtect VPN client on Windows.
- For setup on other systems, or for CIS Students, see the Highline VPN Guide.
Instructions
Step 1 – GlobalProtect for Windows
Note: Images may vary based on your device and settings.
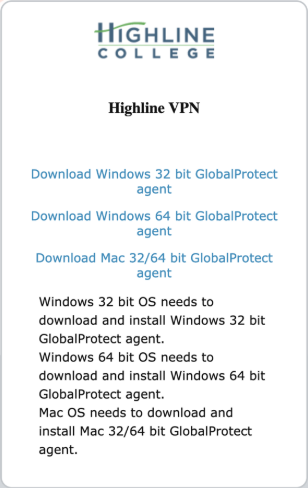
Download the GlobalProtect VPN client software. You will need to log in using your myHighline username and password, and verify your identity with Okta.
Step 2
Select the appropriate agent (for most Windows installations, select ‘Download Windows 64 bit GlobalProtect agent’).
Step 3
The GlobalProtect installer package will be sent to your Downloads folder by default (one way of finding this is by typing “Downloads” in your Start Menu). Open the file.

Step 4
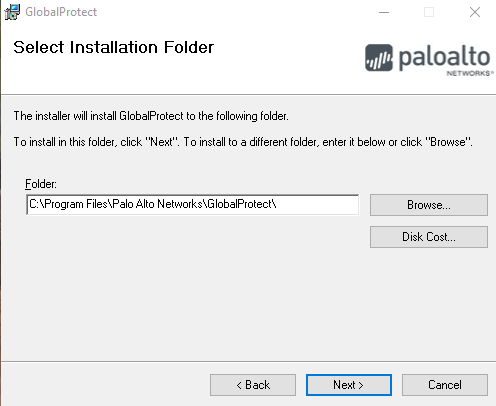
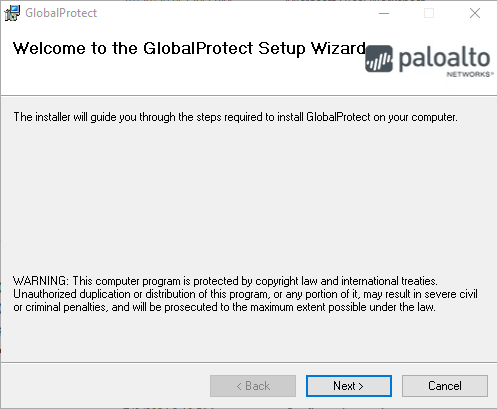
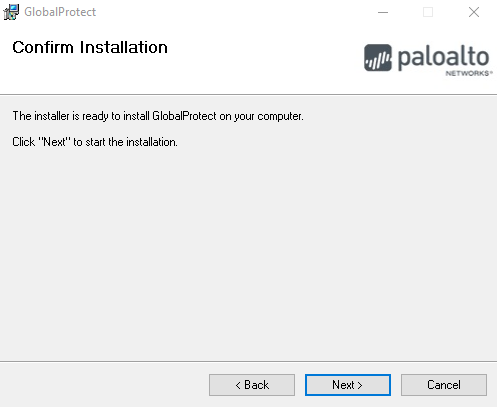
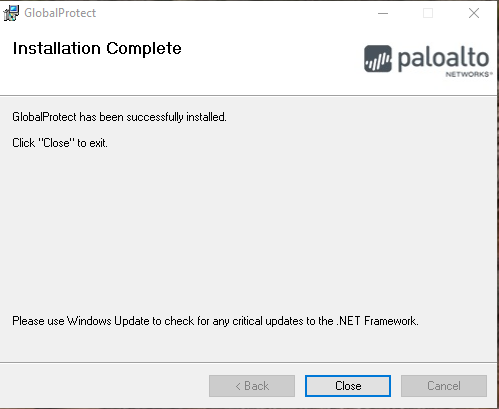
Click ‘Next’ for the following screens to choose the default settings:
Select Installation Folder
Welcome to the GlobalProtect Setup Wizard
Confirm Installation
Installation Complete
Step 5 – Adding the VPN Portal Address
First time setup requires you to add a new ‘portal’ address to the GlobalProtect VPN client.
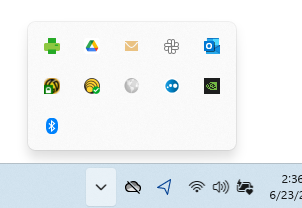
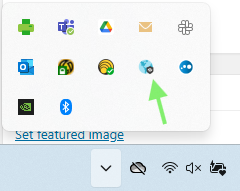
If it is installed, you can find it by looking at the bottom right of your screen and clicking the up-arrow to open the system tray. GlobalProtect is a globe icon, and it will be greyed out when not connected. Click to open the GlobalProtect client.
Step 6
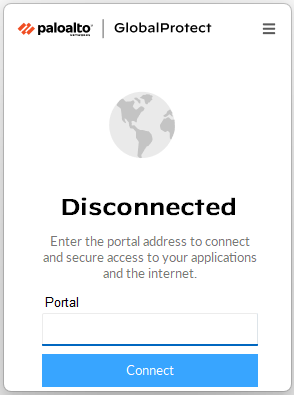
The log in screen for GlobalProtect will pop up. Note that the screen will close automatically if you click away from it, but if that happens, you will be able to to open it from the system tray again.
It will say “Disconnected” and ask for a portal address. To set up the portal, first click the menu icon (3 lines at the top right) and select ‘Settings’ from the drop down menu.
Step 7
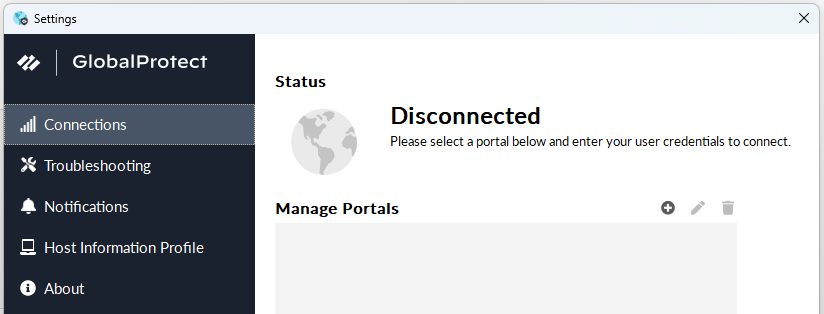
The ‘Settings’ screen will pop up. Note that this screen stays on top of other windows until closed.
It will open up in the ‘Connections’ tab by default. The screen will say “Disconnected – Please select a portal below and enter your user credentials.”
In the ‘Manage Portals’ section below, click the small circle with a + sign in it, to add a new portal.
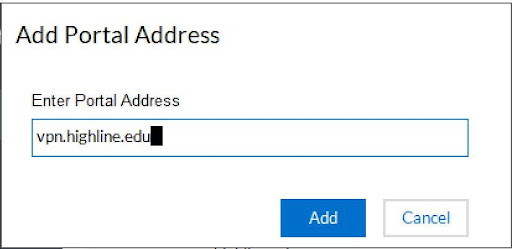
Step 8
In the ‘Add Portal Address’ box that pops up, you will enter the Highline VPN address:
- For CIS Students: cisvpn.highline.edu
- For Faculty and Staff: vpn.highline.edu
Click the blue ‘Add’ button.
Step 9
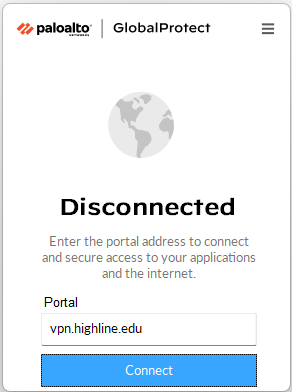
You will be returned to the ‘Settings’ screen. The ‘Manage Portals’ section will now list the Highline VPN. Close the window and return to the log-in screen (you will probably have to open it from the system tray like before).
The Highline VPN will be the default portal listed in the text box. Click the blue ‘Connect’ button.
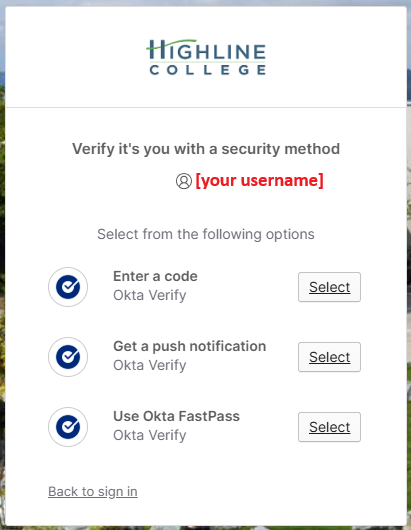
Step 10
You will be redirect to a browser to log in using Okta MFA with your Highline credentials.
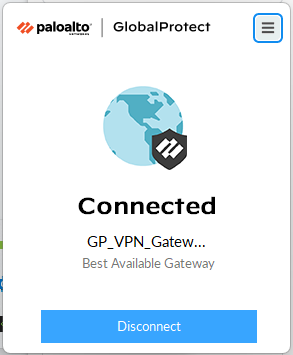
Once logged in, when you look in the system tray you will see that the globe icon is now blue to show it is connected.
![]()
If you bring up the log in screen, you will see it now reads “Connected” and the globe image is also blue.
You can now use the internet with your browser and applications like normal.
Important! When you are done working online, bring up this log-in screen and click the blue ‘Disconnect’ button to end your session and free up usage for other employees.
To disconnect, you can find the GlobalProtect client by looking for the icon in the system tray or by typing ‘GlobalProtect’ in the Windows Start Menu until the app comes up.
Click the blue ‘Disconnect’ button. The globe image will turn grey, and it will say “Disconnected” below it. The VPN Portal address will remain by default.

Questions?
- Please contact the Help Desk.